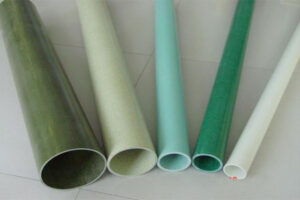
Making a fiberglass tube involves a few steps and some specialized materials and tools. However, with a little bit of preparation and careful attention to detail, it is a task that can be accomplished by anyone with a bit of know-how and patience.

Fiberglass Tubes
Steps to Make Fiberglass Tube
- The first step in making a fiberglass tube is to gather all of the necessary materials. This will include fiberglass fabric, fiberglass resin, a release agent (such as wax or PVA), a mixing cup and stick, and a means of rotating the tube as it cures (such as a lathe or a lazy Susan). It is also a good idea to have some gloves, a respirator, and protective eyewear on hand to protect yourself from the chemicals used in the process.
- Once you have all of your materials ready, the next step is to prepare the mold. If you are using a pre-made mold, you will need to coat it with the release agent to prevent the fiberglass from sticking. If you are making your own mold, you will need to build a form around a cylindrical object (such as a PVC pipe or a cardboard tube) that is the desired size and shape of your finished tube. You will then coat the form with the release agent and allow it to dry.
- Next, it is time to mix the fiberglass resin. Follow the instructions on the resin package to mix the appropriate amount of resin and hardener. Be sure to mix the resin thoroughly, as any unmixed resin will not cure properly and will weaken the finished tube.
- Once the resin is mixed, it is time to lay the fiberglass fabric. Begin by cutting the fabric into strips that are slightly wider than the desired finished width of the tube. Dip the fabric strips into the resin mixture, making sure to coat both sides evenly. Then, starting at one end of the mold, begin laying the fabric strips onto the mold, overlapping the edges slightly. Use a brush or roller to smooth out the fabric and remove any air bubbles.
- Continue laying the fabric strips until the entire mold is covered. If you are using a pre-made mold, you will probably only need to lay one layer of fabric. If you are using a homemade mold, you may need to lay multiple layers to ensure a strong and durable tube. Allow the first layer to cure completely before adding additional layers.
- Once you have completed laying the fabric, it is time to remove the tube from the mold. If you are using a pre-made mold, simply release the clamps or screws holding the mold together and gently remove the tube. If you are using a homemade mold, you will need to carefully cut the tube free from the form, being careful not to damage the fiberglass.
- Once the tube is removed from the mold, it will need to be trimmed and sanded to achieve a smooth finish. Use a sharp knife or a pair of scissors to trim away any excess fabric, and then sand the edges and any rough spots with a fine-grit sandpaper.
- Finally, you can finish the tube with a coat of paint or a clear coat to protect it from the elements. Allow the paint or clear coat to dry completely before using the tube.
In conclusion, making a fiberglass tube requires a bit of time and attention to detail, but with the right materials and tools, it is a task that anyone can master. By following the steps outlined above, you can create a strong and durable fiberglass tube that will last for years to come.


