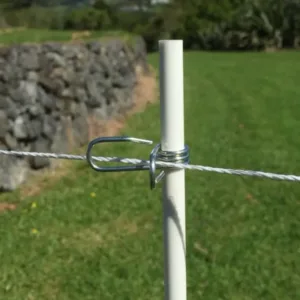
Fiberglass fence posts are a durable and low-maintenance option for many types of fencing projects. Here’s a step-by-step guide to help you install them correctly.

how to install fiberglass fence posts
Materials You’ll Need
- Fiberglass fence posts
- Posthole digger or auger
- Gravel
- Concrete mix
- Level
- Tape measure
- String line
- Post caps (optional)
Step 1: Plan Your Fence Layout
First, determine where you want to install your fence. Measure the perimeter and mark the locations of each post with stakes. Use a string line to ensure your fence will be straight. Typically, fence posts are spaced 6 to 8 feet apart.
Step 2: Dig the Post Holes
Using a posthole digger or auger, dig holes at each marked spot. The depth of the holes should be about one-third the length of the fence posts, usually around 2 to 3 feet deep. The diameter of the hole should be about three times the width of the post.
Step 3: Add Gravel for Drainage
Pour about 6 inches of gravel into the bottom of each hole. This will help with drainage and prevent water from pooling around the base of the posts, which can cause damage over time.
Step 4: Set the Posts
Place the fiberglass post in the hole. Check that the post is level using a spirit level. Adjust as needed until the post is perfectly vertical.
Step 5: Pour the Concrete
Mix your concrete according to the manufacturer’s instructions. Pour the concrete into the hole around the post, filling it to just above ground level. Use a trowel to smooth the surface of the concrete. Ensure the post remains level while the concrete sets.
Step 6: Secure the Posts
Allow the concrete to cure for at least 24 hours before attaching any fence panels or rails. This will ensure the posts are securely set in place.
Step 7: Attach the Fence Panels
Once the concrete has cured, you can attach your fence panels or rails to the posts. Depending on the type of fence you’re installing, you might need screws, brackets, or other hardware. Follow the manufacturer’s instructions for the best results.
Step 8: Finishing Touches
If desired, add post caps to the tops of your posts. These can enhance the look of your fence and provide additional protection against weather elements.
Tips for Success
- Double-check that each post is level before the concrete sets.
- Work on one post at a time to ensure each one is properly aligned and secured.
- If you’re installing a gate, make sure the posts are extra secure as they will bear additional weight and stress.
By following these steps, you’ll have a sturdy and attractive fiberglass fence that will last for years to come. Happy fencing!
This guide is designed to help you install fiberglass fence posts with ease. By planning carefully and following these steps, you’ll create a durable and long-lasting fence that meets your needs. Remember, proper installation is key to the longevity and performance of your fence.


