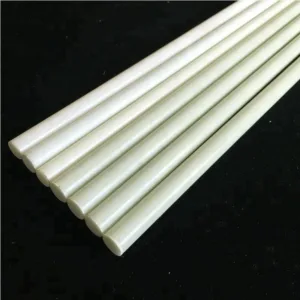
Making a DIY fiberglass stake-out pole is a great project if you enjoy kayaking, fishing, or need a sturdy, lightweight pole for various outdoor activities. A stake-out pole allows you to anchor your small watercraft in shallow waters quickly. Here’s a straightforward guide to creating one yourself:

diy fiberglass stake out pole
Materials Needed:
- Fiberglass Rod: Typically 6 to 8 feet long and about 3/4 inch in diameter. You can find these online or at some hardware stores.
- Sharp Point: You can either sharpen one end of the rod yourself using a grinder or attach a metal or hardened tip. This is necessary for easy insertion into the ground or riverbed.
- Handle Grip: Foam grips, bicycle handles, or even wrapped paracord can be used to create a comfortable handle.
- Wrist Strap: Optional, for securing the pole to your wrist or kayak.
- Epoxy or Strong Adhesive: For securing any attachments like the sharp tip or end cap.
- End Cap: Rubber or plastic cap to cover the bottom end (if you’re not sharpening both ends).
Steps to Make the Stake-Out Pole:
Prepare the Fiberglass Rod:
- Cut the rod to your desired length if necessary.
- Sand any rough edges to avoid splinters.
Attach the Sharp Point:
- If you’re using a separate tip, attach it to one end of the rod using epoxy. Ensure it’s aligned straight and let the epoxy cure as per the instructions.
- Alternatively, sharpen one end of the rod with a grinder if you prefer an all-fiberglass tip.
Install the Handle Grip:
- Slide a foam grip over the other end of the rod. If it’s loose, use some adhesive to keep it in place.
- Wrap the handle area with paracord or similar material for extra grip and comfort. Secure the ends of the wrap with small knots or adhesive.
Add the Wrist Strap:
- Attach a wrist strap near the handle if desired. This can be done by drilling a small hole through the rod and securing the strap with a knot inside or using a sturdy loop of paracord.
Cap the Bottom:
- Place an end cap on the non-sharp end of the pole to prevent dirt and debris from getting inside the pole and to offer a clean finish.
Test Your Pole:
- Check the sharpness and firmness of all parts.
- Ensure the grip is comfortable and non-slip.
Tips for Use:
- Always check local regulations regarding the use of stake-out poles, especially in protected areas.
- Regularly inspect your DIY pole for any wear or damage, especially if you often use it in saltwater, which can be harsh on materials.
Creating your own fiberglass stake-out pole is not only cost-effective but also allows you to customize the pole to your specific needs and preferences. Enjoy your time on the water with this handy tool!


